
Have you ever wondered why your skin breaks out despite using the best skincare products? The culprit might be hiding in plain sight on your vanity table.
Dirty makeup brushes harbor bacteria, dead skin cells, oil, and old makeup residue that transfer directly onto your face every time you apply cosmetics. Studies show that makeup tools can accumulate harmful bacteria like Staphylococcus and E. coli when not cleaned regularly, leading to clogged pores, inflammation, and persistent acne breakouts.
The good news? Learning how to clean makeup brushes properly is straightforward, affordable, and can dramatically improve your skin’s health. In this comprehensive guide, you’ll discover proven techniques for deep-cleaning your beauty tools, establishing the right cleaning schedule, and maintaining brushes that support clear, radiant skin instead of sabotaging it.
Whether you’re dealing with stubborn breakouts or simply want to practice better beauty hygiene, this article provides everything you need to transform your makeup routine into a skin-friendly ritual.
Why Dirty Makeup Brushes Cause Acne and Skin Problems
The Hidden Dangers Lurking in Your Makeup Brushes
Every time you use a makeup brush, it collects multiple layers of contamination that create the perfect breeding ground for skin issues.
What accumulates on unwashed brushes:
- Sebum (skin oil) that attracts bacteria
- Dead skin cells that clog pores
- Product buildup from foundations, powders, and creams
- Environmental pollutants and dust particles
- Bacteria, yeast, and fungi that multiply rapidly
- Traces of food particles if you eat while applying makeup
When these contaminated brushes touch your face, they push all these irritants directly into your pores, triggering inflammatory responses that manifest as pimples, blackheads, cysts, and redness.
How Often Should You Clean Makeup Brushes to Prevent Breakouts?
The cleaning frequency depends on the type of brush and how often you use it, but here’s a practical guideline:
| Brush Type | Cleaning Frequency | Reason |
|---|---|---|
| Foundation brushes | After every use or weekly minimum | Liquid products breed bacteria fastest |
| Concealer brushes | After every use or weekly minimum | Applied to breakout-prone areas |
| Powder brushes | Every 1-2 weeks | Dry products accumulate slower |
| Blush/bronzer brushes | Every 2 weeks | Less direct contact with problem areas |
| Eyeshadow brushes | Weekly or bi-weekly | Eye area is sensitive to infection |
| Lip brushes | After every use | Direct contact with mucous membranes |
| Beauty sponges | After every single use | Retain the most moisture and bacteria |
Quick tip: If you have active acne, clean all brushes that touch affected areas after every single use to prevent reinfection.
What You Need: Best Products for Cleaning Makeup Brushes
Professional Cleaning Solutions vs. DIY Alternatives
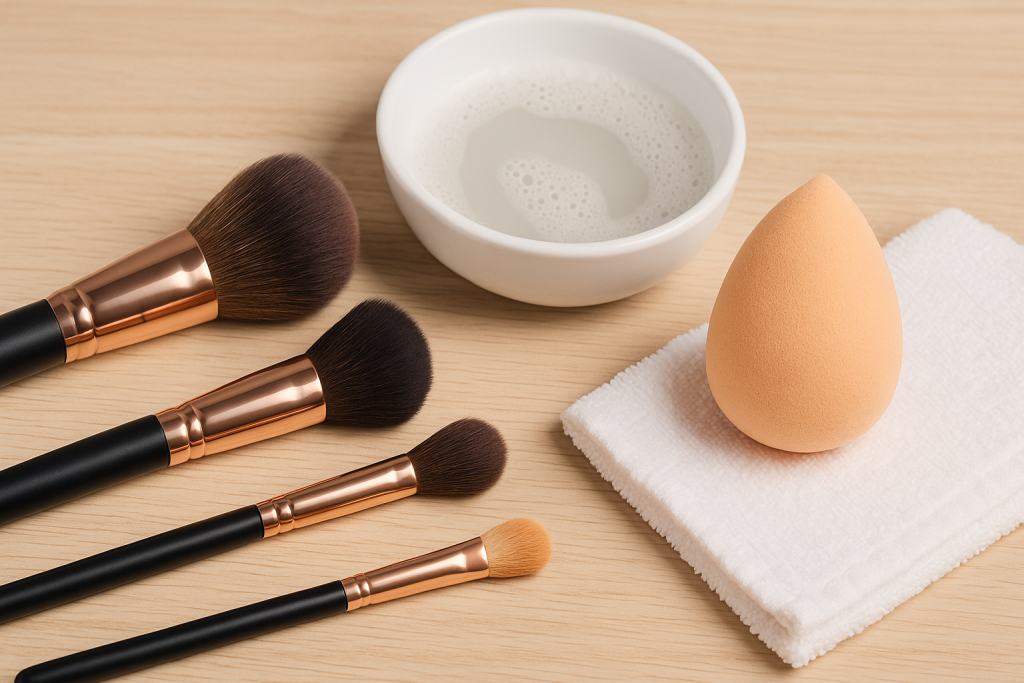
You don’t need expensive specialty products to achieve professional-level brush cleaning. Here are your options:
Store-Bought Brush Cleansers:
- Cinema Secrets Professional Brush Cleaner
- EcoTools Makeup Brush Cleansing Shampoo
- Real Techniques Brush Cleansing Gel
- Sigma Beauty SigMagic Brushampoo
Effective DIY Solutions:
- Baby shampoo (gentle and fragrance-free)
- Castile soap (natural and antibacterial)
- Gentle face wash (what works for your skin works for brushes)
- Dish soap mixed with olive oil (for stubborn makeup)
Additional Tools You’ll Need
- Clean towel or microfiber cloths
- Brush cleaning mat or textured silicone pad (optional but helpful)
- Clean bowl or sink
- Lukewarm water
- Paper towels for initial product removal
- Brush drying rack or flat surface
Pro insight: The texture of cleaning mats helps deep-clean between bristles more effectively than hands alone, making them worthwhile for serious makeup users.
Step-by-Step Guide: How to Deep Clean Makeup Brushes
Method 1: The Basic Deep Clean (For Regular Maintenance)
This method works perfectly for weekly or bi-weekly cleaning sessions.
Step 1: Rinse with lukewarm water Hold the brush bristles downward under running lukewarm water. Never let water reach the ferrule (the metal part holding bristles) as this loosens the glue over time.
Step 2: Apply cleanser Pour a small amount of brush cleaner or gentle shampoo into your palm or onto a cleaning mat. Swirl the brush gently in circular motions to create lather.
Step 3: Work out the makeup Continue swirling and gently massaging the bristles. You’ll see makeup residue flowing out. For dense brushes, use your fingers to separate bristles and clean deeper.
Step 4: Rinse thoroughly Rinse under lukewarm water while continuing to massage bristles. Keep rinsing until the water runs completely clear with no soap or makeup residue.
Step 5: Squeeze out excess water Gently squeeze the bristles from base to tip to remove water. Never twist or pull, as this damages brush shape.
Step 6: Reshape and dry Reshape the bristles to their original form. Lay flat on a clean towel with bristles hanging off the edge (allows air circulation underneath) or use a brush drying rack. Never dry upright, as water seeps into the ferrule.
Drying time: 6-8 hours for most brushes, up to 24 hours for dense foundation brushes.
Method 2: Quick Daily Cleaning (For Foundation and Concealer Brushes)
For brushes used on acne-prone areas, daily spot cleaning prevents bacteria buildup between deep cleans.
Fast-drying spray method:
- Spray brush cleaner onto bristles
- Swirl on a clean paper towel or microfiber cloth
- Repeat until no color transfers
- Let air dry for 5-10 minutes
This takes only 30 seconds per brush and dramatically reduces acne-causing bacteria.
Method 3: The Two-Product Deep Clean (For Stubborn Makeup)
When dealing with waterproof makeup or heavy foundation buildup:
Phase 1 – Oil Cleanse:
- Apply olive oil or cleansing oil to bristles
- Swirl gently to break down makeup
- Wipe on paper towel to remove bulk
Phase 2 – Soap Cleanse:
- Follow with regular shampoo or brush cleanser
- Lather and rinse thoroughly
- Ensure no oil residue remains
This method prevents leaving oily residue that attracts dirt and bacteria.
Common Mistakes That Keep Your Brushes Dirty (And Your Skin Breaking Out)
Mistake #1: Not Cleaning Brushes Often Enough
Many people clean brushes only when they look visibly dirty, but bacteria multiply long before discoloration appears. Even if brushes look clean, they’re accumulating oils and microbes with every use.
The fix: Set phone reminders for your cleaning schedule based on the frequency table above.
Mistake #2: Using Hot Water
Hot water damages natural and synthetic bristles, causing them to become brittle, shed, and lose their shape. It also melts the glue holding bristles in place.
The fix: Always use lukewarm or cool water for rinsing and cleaning.
Mistake #3: Drying Brushes Upright
When brushes dry standing upright in a cup, water seeps into the ferrule, loosening glue and creating mold growth in the handle.
The fix: Always dry flat or hanging downward to keep water away from the base.
Mistake #4: Not Rinsing Thoroughly
Soap residue left in bristles transfers to your skin, potentially causing irritation and clogged pores, especially if you have sensitive skin.
The fix: Rinse until water runs completely clear and squeeze out excess product between rinses.
Mistake #5: Sharing Brushes Without Cleaning
Sharing makeup brushes spreads bacteria, viruses, and skin conditions between people, increasing everyone’s acne risk.
The fix: Either avoid sharing or thoroughly clean and disinfect brushes immediately after someone else uses them.
Mistake #6: Using Harsh Chemicals
Alcohol-based cleaners, bleach, or harsh detergents damage bristles and can leave irritating residues that worsen acne when transferred to skin.
The fix: Stick with gentle, skin-safe cleansers like baby shampoo or professional brush cleaners.
How to Disinfect Makeup Brushes for Acne-Prone Skin
When You Need Extra Disinfection
If you’re dealing with active acne breakouts, infected pimples, or have recently recovered from a skin infection, standard cleaning might not eliminate all bacteria.
Safe Disinfection Methods
Method 1: Isopropyl Alcohol Spray (70%)
- After regular cleaning and drying, lightly mist bristles with 70% isopropyl alcohol
- Let sit for 60 seconds
- Allow to air dry completely before next use
- Use this method weekly for acne-prone skin
Method 2: Antibacterial Soap Addition Add one pump of antibacterial hand soap to your regular brush cleaning routine for extra bacteria-fighting power.
Method 3: UV Sanitizer (Optional) Some makeup users invest in UV sanitizer boxes designed for brushes, which eliminate bacteria using ultraviolet light between washes.
Important note: Always clean brushes thoroughly before disinfecting. Disinfectants work on clean surfaces but can’t penetrate layers of makeup and oil.
Special Care: Cleaning Different Types of Makeup Brushes
Natural Hair Brushes (Sable, Goat, Squirrel)
Natural bristles require gentler treatment to maintain softness and shape.
Best practices:
- Use mild baby shampoo or specialized natural brush cleaner
- Add a tiny drop of hair conditioner during final rinse
- Never soak in water for extended periods
- Dry completely flat to maintain shape
- Clean every 1-2 weeks depending on use
Synthetic Brushes (Nylon, Taklon)
Synthetic brushes are more durable and can withstand more frequent, vigorous cleaning.
Best practices:
- Can handle slightly warmer water than natural brushes
- Work well with most cleansers including dish soap
- Dry faster than natural bristles
- More resistant to bacteria growth
- Ideal for liquid products and acne-prone users
Beauty Sponges and Blenders
Beauty sponges require special attention as their porous nature traps the most bacteria.
Cleaning process:
- Wet sponge completely under running water
- Apply generous amount of cleanser
- Squeeze and massage repeatedly until water runs clear
- Continue squeezing under running water
- Microwave damp (not dripping) sponge for 30 seconds to kill bacteria (optional)
- Air dry completely in ventilated area
Replacement schedule: Even with proper cleaning, replace beauty sponges every 3 months maximum.
Creating Your Makeup Brush Cleaning Schedule
Weekly Cleaning Routine
For daily makeup users:
Sunday evening (or preferred night):
- Deep clean all foundation and concealer brushes
- Quick clean powder and blush brushes
- Wash beauty sponges
Wednesday evening:
- Spot clean foundation brushes used since Sunday
- Quick spray clean other frequently used brushes
As needed:
- Daily spot cleaning for brushes touching active breakouts
- Immediate cleaning after applying makeup to someone else
Tracking Your Cleaning Schedule
Use these methods to remember your cleaning routine:
- Set recurring phone calendar reminders
- Keep a small checklist on your bathroom mirror
- Use a dry-erase marker on your mirror to track last cleaning date
- Take a photo of clean brushes with date stamp
- Use habit-tracking apps to build consistency
Pro tip: Store clean and dirty brushes in separate containers so you always know which need cleaning.
Signs Your Makeup Brushes Are Making Your Acne Worse
Red Flags That Demand Immediate Cleaning
Pay attention to these warning signs that indicate your brushes are contributing to skin problems:
Visual indicators:
- Visible makeup buildup on bristles
- Crusty or hardened areas
- Discoloration of white or light-colored bristles
- Shedding bristles during application
- Loss of original brush shape
Skin reactions:
- Breakouts appearing within 24 hours of makeup application
- New pimples forming in areas where brushes touch most
- Increased skin irritation or redness during application
- Itching sensation when applying makeup
- Worsening existing acne despite good skincare routine
Performance issues:
- Makeup applies unevenly or looks patchy
- Brushes feel stiff or scratchy on skin
- Products don’t blend as smoothly as they used to
- Bristles clump together during use
If you notice any of these signs, stop using the brush immediately and perform a thorough deep clean before next use.
Best Practices for Maintaining Clean Brushes Between Washes
Daily Habits That Prevent Bacteria Buildup
After each makeup application:
- Wipe brushes on a clean tissue to remove excess product
- Store brushes upright in a ventilated container (not closed drawer)
- Keep brushes away from bathroom humidity when not in use
- Avoid placing used brushes back in the same compartment as clean ones
Storage tips for acne prevention:
- Use a mesh or wire brush holder that allows air circulation
- Store brushes with bristles facing up but in a dry environment
- Keep brushes away from sinks where water splashes
- Consider a brush cover or case only after brushes are completely dry
- Clean your brush storage container monthly
Environmental factors:
- Avoid using makeup in humid bathrooms right after showers
- Keep brushes away from hairspray and other aerosol products
- Don’t store brushes near windows with direct sunlight (degrades bristles)
- Replace brush caps only on completely dry brushes
Quick Cleaning Between Deep Cleans
Daily spray routine:
- Keep a bottle of quick-dry brush cleaner at your vanity
- After each use, spray bristles 2-3 times
- Swirl on a clean towel until no color transfers
- Let air dry for 5-10 minutes before storing
This 30-second routine dramatically reduces bacteria without requiring a full wash.
How Long Should Makeup Brushes Last?
When to Replace vs. When to Clean
Even with perfect cleaning habits, makeup brushes have a lifespan:
High-quality natural brushes: 5-10 years with proper care Mid-range synthetic brushes: 2-5 years Budget brushes: 6 months to 2 years Beauty sponges: 3 months maximum, regardless of cleaning
Signs It’s Time to Replace, Not Just Clean
- Bristles continuously shed during use and cleaning
- Ferrule (metal part) is loose or detaching from handle
- Bristles have permanently lost their shape despite reshaping efforts
- Brush causes irritation even when freshly cleaned
- Strong odor persists after thorough cleaning
- Visible mold or discoloration that won’t wash out
Acne consideration: If you’ve had a severe skin infection, consider replacing all brushes used during that period rather than trying to disinfect them.
The Connection Between Clean Brushes and Clear Skin
Understanding the Skin-Brush Relationship
Your skin health and brush hygiene exist in a continuous cycle. Dirty brushes cause breakouts, which produce more oil and bacteria, which further contaminate brushes, creating worse breakouts.
How clean brushes improve skin:
- Reduced bacterial transfer: Clean bristles don’t deposit harmful microbes into pores
- Better product performance: Makeup applies more evenly on clean brushes, requiring fewer layers that could clog pores
- Less inflammation: Removing irritating residues prevents inflammatory acne responses
- Improved healing: Stopping reinfection allows existing breakouts to heal faster
- Enhanced skincare efficacy: Clean application tools don’t counteract the benefits of your skincare routine
Real Results: What to Expect After Implementing Proper Brush Hygiene
Week 1-2:
- Reduced new breakouts in areas where you apply makeup
- Less irritation during makeup application
- Smoother, more even makeup finish
Week 3-4:
- Noticeable improvement in existing acne
- Fewer inflammatory pimples
- Improved skin texture
Month 2-3:
- Significantly clearer skin overall
- Better response to other acne treatments
- Reduced need for heavy coverage makeup
Important: Brush cleaning works best as part of a comprehensive skincare routine including cleansing, moisturizing, and sun protection.
Budget-Friendly Brush Cleaning Solutions
DIY Recipes That Work as Well as Store-Bought
Basic Daily Cleaner:
- 2 parts water
- 1 part isopropyl alcohol (70%)
- 2-3 drops tea tree oil (optional, for antibacterial properties)
Mix in a spray bottle. Shake before each use. Lasts 2-3 months.
Deep Cleaning Solution:
- 1 tablespoon baby shampoo
- 1 tablespoon white vinegar
- 1 cup warm water
Mix in a bowl. Use for weekly deep cleans. Make fresh each time.
Heavy-Duty Makeup Remover:
- 1 part dish soap
- 2 parts olive oil
Blend together. Use for waterproof makeup removal. Follow with regular shampoo wash.
Making Your Cleaning Budget Stretch
Cost-effective practices:
- Buy baby shampoo in bulk (works for brushes and is gentle on skin)
- Use a textured silicone placemat instead of expensive brush cleaning mats
- Create your own drying rack using a binder clip and towel
- Reuse spray bottles for DIY cleaner mixtures
- Clean regularly to extend brush lifespan and avoid replacement costs
Average cost comparison:
- Professional brush cleaner: $15-30 per bottle
- Baby shampoo (works equally well): $3-5 per bottle
- DIY solution ingredients: $5-10 for 6+ months of supplies
Expert Tips from Professional Makeup Artists
Industry Secrets for Pristine Brushes
Professional makeup artists share these valuable insights from years of experience:
Tip #1: The Two-Brush System Keep two sets of your most-used brushes. While one set dries after cleaning, use the second set. This ensures you always have clean brushes ready and prevents rushing the drying process.
Tip #2: Color-Code Your Brushes Use colored tape or markers to designate certain brushes only for specific products (red for foundation, blue for powder). This prevents cross-contamination and makes cleaning schedules clearer.
Tip #3: The Olive Oil Pre-Treatment For brushes caked with stubborn makeup, a quick olive oil massage before shampooing breaks down products faster and requires less scrubbing, extending brush life.
Tip #4: The Conditioning Treatment Once monthly, add a tiny amount of hair conditioner during the final rinse of natural brushes to maintain softness and prevent drying out.
Tip #5: Spot Test New Cleaners Before using any new cleaning solution on your entire brush collection, test it on one old or inexpensive brush first to ensure it doesn’t damage bristles.
Tip #6: Professional Drying Method Invest in or DIY a brush drying rack that suspends brushes upside down. This professional setup ensures perfect drying every time and maintains brush shape better than laying flat.
Conclusion: Clear Skin Starts With Clean Brushes
Cleaning your makeup brushes properly isn’t just about hygiene—it’s an essential step in achieving and maintaining clear, healthy skin. Dirty brushes create a cycle of breakouts that can undermine even the most expensive skincare routines, while consistent brush cleaning can transform your complexion within weeks.
The key takeaways for acne-free brush use:
- Clean liquid foundation and concealer brushes weekly minimum, daily for active breakouts
- Use gentle, skin-safe cleansers like baby shampoo or professional brush cleaners
- Always dry brushes flat or hanging downward, never upright
- Implement quick daily spray cleaning between deep washes
- Replace brushes when they show signs of permanent damage
- Store clean and dirty brushes separately in ventilated containers
Remember that brush cleaning becomes easier once it’s part of your routine. Set aside 15 minutes weekly for this simple practice, and your skin will thank you with fewer breakouts, less irritation, and a clearer complexion.
Take action today: Choose one of the cleaning methods outlined in this guide and commit to your first deep clean this week. Track your skin’s progress over the next month, and you’ll see firsthand why clean brushes are non-negotiable for anyone serious about clear skin.
Your journey to healthier skin and better makeup application starts with the brushes you already own—you just need to keep them clean.
FAQs About How to Clean Makeup Brushes Properly
Can I use hand soap to clean my makeup brushes?
Yes, gentle hand soap can work for cleaning makeup brushes, but choose fragrance-free, moisturizing formulas without harsh chemicals. Avoid antibacterial hand soaps with triclosan or other strong ingredients that might damage delicate bristles or irritate your skin when transferred during makeup application. Baby shampoo remains the safer, more effective option for regular brush cleaning since it’s specifically designed to be gentle.
Do I need to clean brushes I only use for powder products?
Absolutely yes. While powder products don’t create the same bacterial breeding ground as liquid makeup, powder brushes still accumulate dead skin cells, natural oils, dust, and bacteria from your face. These buildups contribute to clogged pores and breakouts over time. Clean powder brushes every 1-2 weeks, even though they don’t require the same intensive daily cleaning as foundation brushes.
Will cleaning my brushes too often damage them?
No, cleaning brushes frequently with proper technique actually extends their lifespan rather than damaging them. The key is using lukewarm water, gentle cleansers, and correct drying methods. What damages brushes is harsh scrubbing, hot water, improper drying, and ironically, leaving them dirty for too long—the makeup buildup causes more bristle damage than regular gentle cleaning ever could.
My brushes smell bad even after washing. What should I do?
A persistent odor after cleaning indicates bacteria or mold growing deep in the bristles or ferrule. First, try the two-phase cleaning method with olive oil followed by antibacterial soap, then mist with 70% isopropyl alcohol and dry completely in a well-ventilated area. If the smell remains, the brush likely has mold growth in the ferrule and should be replaced for your skin’s safety. Prevent future odor by ensuring brushes dry completely between uses.
Can I use the same cleaning method for brushes I use on my eyes versus my face?
While the cleaning process is similar, eye brushes require even more careful attention because the eye area is particularly sensitive to infection. Use separate cleaning water for eye brushes if you’re batch-cleaning to avoid cross-contamination. If you’ve had any eye infections like pink eye, either replace those brushes or disinfect them with isopropyl alcohol after a thorough cleaning. Consider cleaning eye brushes more frequently than face brushes to protect this delicate area.